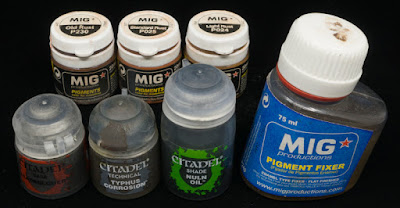
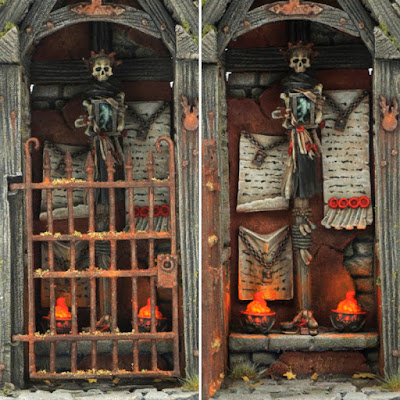
To complete this tutorial you will need the following:
PAINTS:
- Citadel Leadbelcher (or any other dark metal color, like Vallejo Chainmail)
- Citadel Nuln Oil (or any other black wash)
- Citadel Typhus Corrosion
PIGMENTS:
- MIG Productions Old Rust (or any other dark rust pigment)
- MIG Productions Standard Rust (or any other medium rust pigment)
- MIG Productions Light Rust (or any other light rust pigment)
- MIG Productions Pigment Fixer
STEP BY STEP TUTORIAL
STEP 1
Basecoat the model in black or dark grey color. It is a good idea to give it a zenithal highlight, although it is not necessary.
STEP 2
Paint the metal area in dark metal color such as Leadbelcher from Citadel or Chainmail from Vallejo.
Wash the area with Nuln Oil from Citadel or any other black wash. You could probably get away with not doing this step but I think it is worth the effort because there is a subtle difference in depth in final paintjob.
Paint the the whole area with watered down Typhus Corrosion. Then apply pure Typhus Corrosion to the parts where rust would accumulate more heavily to give it more texture. While the paint is still wet I like to run my finger over some exposed details like edges, rivets, etc. making these details highlighted and less affected by rust.
Apply Old Rust or any other dark rust pigment. Apply it with a brush, as a powder, not mixed with water. Cover most of the surface but think about where would rust in real life accumulate more and put more pigment to those areas (most often that would be the same areas where you applied pure Typhus Corrosion).
Apply Standard Rust or any other medium rust pigment. As you are moving to lighter rust tones you should concentrate on smaller areas, more affected with rust. Like (in this example) places where metal got eaten through by rust or in the recesses.
STEP 7
Apply the Light Rust pigment to the spots most affected by rust.
STEP 8
To seal/fix the pigments in place use the Pigment Fixer. Apply it with a brush but without doing brush strokes. You don't want to mess everything up. Just touch the surface on a few spots with a loaded brush and let the capillary effect do it's work. Keep in mind that the pigments get toned down once you apply pigment fixer, so don't be afraid to go a little overboard when applying them.
And there you have it, I hope you found this tutorial useful. 🧛♀️ Cheers! 🍺


