Showing posts with label basing. Show all posts

Sunday, May 7, 2023

Vengorian Lord WIP

After a quite some time I'm working on a more recent release from Games Workshop, the Vengorian Lord, which I am going to be adding to my main Vampire Counts force. It will represent vampire Kruger Wärgner when he takes the monster form. I think it's a really cool model and will look epic on the battlefield towering over rest of the troops.

It took me three evenings just to clean the model, fill the gaps and make the base. I decided to leave the wings unassembled to make it easier to paint the model.

Vengorian Lord
I'm calling the base done. I added some bits from Tabletop World, like broken bell, candle holder and some decorative elements to make it look as tough the vampire is standing on a ruined church. I was thinking about adding some moss and small bushes to the base as well but decided that I spent enough time working on the base and want to move to paint the monster itself.
Vengorian Lord
Vengorian Lord
Vengorian Lord
Vengorian Lord
Vengorian Lord
Vengorian Lord
Now let's paint the Vampire! :)

Sunday, January 10, 2021

Adding non GW miniatures to my Vampire Counts army

Last two weeks I've been painting non GW miniatures for a change. I've used three different companies for the first time. I'm pretty happy with the quality of their stuff and I'm going to use them again.

I've had my eye on Scibor Miniatures Necromancer for quite some time and finally decided to get it and paint it. He will be designated to the Todtstein Shock Troops. Model is cast in resin, great quality, no air bubbles, minor flesh to be cleaned. I had to place him on 50mm base, so he is taking four spaces in the unit, which is kind a logical since there are three zombies emerging from the ground around him. I had to put in extra effort on the base, to make the zombies look as though they are raising from the ground.

I'm pleased with the end result. Only thing I'm not 100% sure about is the green glow. Think maybe it would look better if I made it a bit more subtle.

warhammer necromancer

Another company I've been wanting to try out for years is the Reaper Miniatures. I've always been a huge fan of their Bone Horror model, so I ordered it together with some Arachno Assassins. These are metal miniatures, although the company has many ranges, some in plastic, some in metal. I decided to paint one of the Assassins first. The design is really simple but effective! Since the model is 90% bone, you can paint it really fast.

Far back in the past, while browsing the internet, I stumbled upon Mournful Knights by Gamezone Miniatures. My mind was blown! They looked so menacing, vicious and packed with action. The whole unit looked as if in the glorious charge. I thought these models are really ahead of it's time. And still, even today I consider them to be one of the best cavalry models out there. That being said, there is some work required prior painting. The miniatures are metal and there are some gaps that needed to be filled with modeling putty. Another thing thing I noticed while painting my first knight is that sometimes it is hard to differentiate what is what on the model. All in all I really like the final result and can't wait to add more knights to the unit!

blood knight
blood knight
blood knight
blood knight

Sunday, December 6, 2020

Flagstone Bases

In this tutorial I am going to show you how I make the flagstone bases for my miniatures, easy and cheap. All you need is your bases, thin sheet of XPS foam, PVA glue, ball pen and an old brush. In this example I am going to do the 25mm square bases but I use the same method for bases of all sizes and shapes.

BUILDING THE BASES

First thing you need to do is clean all of the bases from the excess flesh formed in the casting process. Since you are going to use bases as rulers for cutting the foam, you don't want to bump into unwanted lumps of plastic.

Turn you base upside down on the thin sheet of XPS foam, press it gently and run your scalpel along the edges of the base. Make sure that you have your blade approximately at the same angle as your base profile. Be careful not to damage the base by cutting into the plastic. Face the blade slightly outwards while you cut.
Once you cut out the foam, it is a good idea to check if it fits nicely with the base. Place it on the base and trim if necessary because you don't want the foam sticking out of the base. I like to do the bases in bulk, most often 20 pieces at a time.
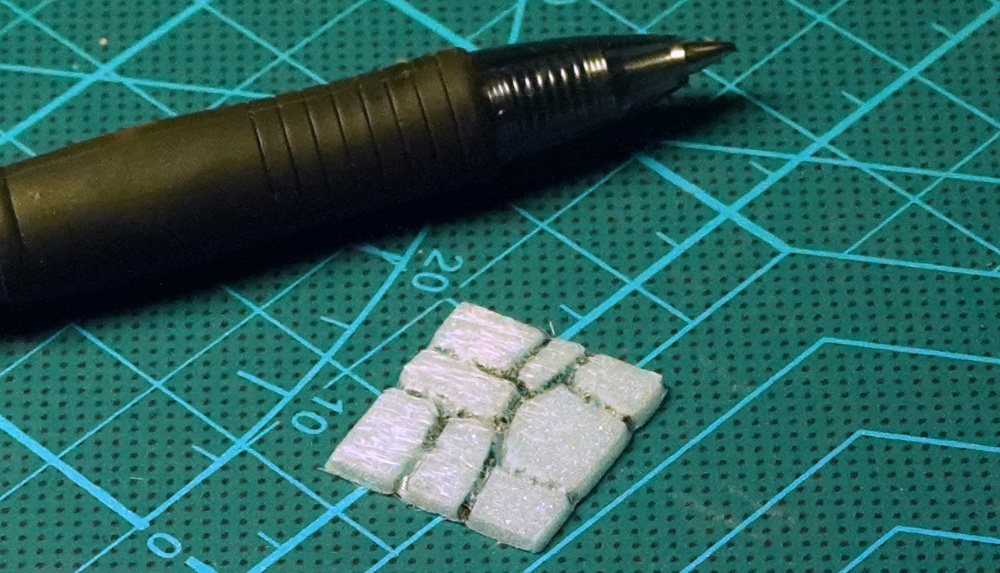
Next step, etch the stone designs into the foam. I use the regular black ball pen for etching. There is a small chance that the ink mixes with paint so you don't want it to be blue or red.
After you are done with etching, it is time to glue the foam pieces onto the bases. Apply the PVA glue onto the base (make sure that you apply it all the way to the edges) and gently press the foam onto it. Use your finger to wipe of the excess glue from the sides of the base. In this step it is good idea to do one by one, because the glue will start to dry if you first apply it to all of the bases and then start attaching the foam. Before moving to the next step leave the bases to dry at least for an hour!
Next, we want to seal the foam an make it plasticky. Apply watered down PVA glue (about 60% glue, 40% water) on the foam part (both the top and the sides). Again use your finger to wipe of any excess glue from the sides of the bases.
Leave the bases over night for the glue to settle and dry and your flagstone bases are ready for painting! :) Note that it is really important to seal the foam prior gluing anything to your bases using superglue because otherwise the glue will eat through it.
Here are some examples of the miniatures based using this technique:
mordheim
mordheim
mordheim
mordheim
mordheim