Sunday, December 13, 2020

Roadside Shrine

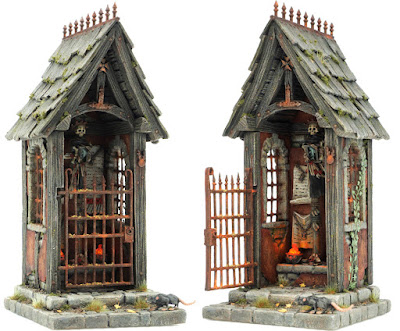
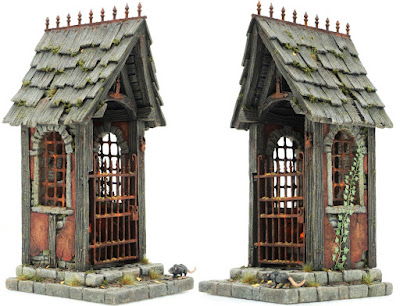
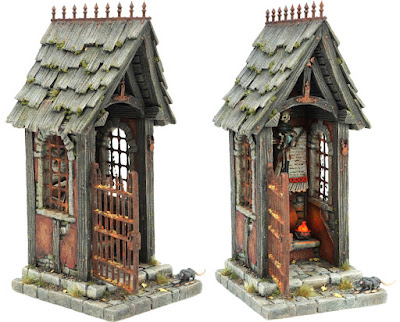
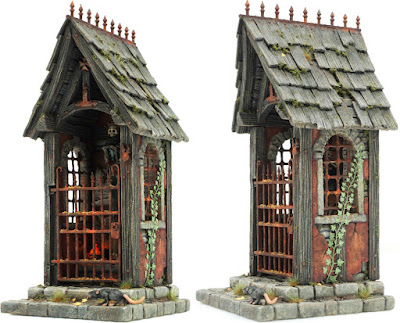
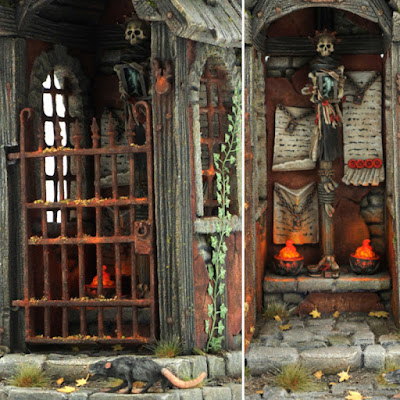
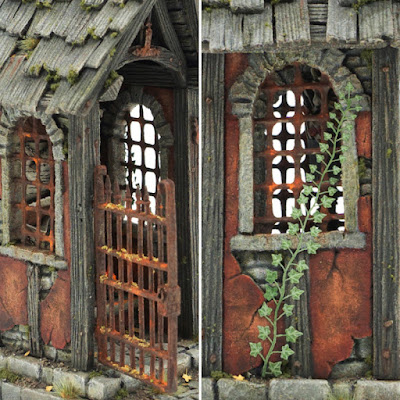
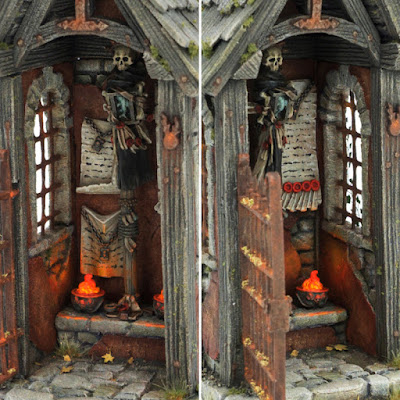
For my second project in XPS foam I wanted to do something smaller and packed with details. Roadside shrine came to mind! I thought it would make a perfect addition to my Mordheim gaming table. And it did! :) In the area were I live there are lots of small roadside shrines so I didn't lack the inspiration. I took from each one what I liked the most and combined it in my own design. The idea was to create a small structure with barred windows on the sides and iron bar gate in the front. The shrine would hold an icon, some parchments with sacred text and two torches.

For the window bars I used a cheap plastic garden fence that I bought in the local hardware store. Gate and spikes are from an old Tabletop World Graveyard kit. Icon is from old Empire Steam Tank (I think), torches are from Vampire Counts Black Coach and parchments are from Warhammer 40k Fyodor Karamazov.

After I have finished the build I sealed everything with watered down PVA glue. Once this was dry I hit everything with black basecoat color. For me, basecaoting scratch built terrain in uniform color is perhaps the most satisfying moment in the hobby. :)

Now it was time to bring the piece to life with some colors. I'm happy with the way it turned out, especially the choice of colors. I also added a rat to the base to make it look more grim. The only thing I dislike is the climbing ivy. This was the first time I was using it. I should have washed it with some brown color and bend some of the leaves to make it look more natural. All in all I'm really pleased with the final result.

mordheim terrain
mordheim terrain
mordheim terrain
mordheim terrain
mordheim terrain
mordheim terrain
mordheim terrain
mordheim terrain

Saturday, December 12, 2020

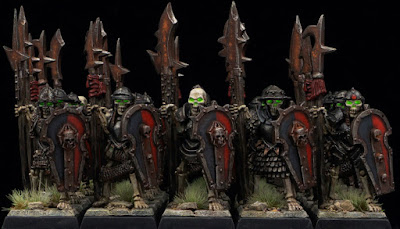
Armored Skeletons

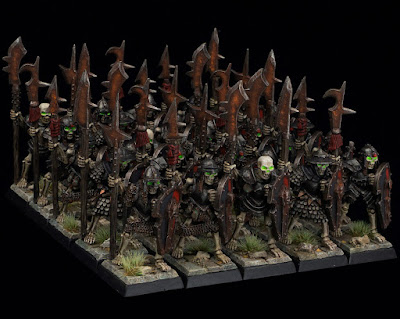
Lately I've been working on my Armored Skeletons. So far the unit is 25 strong. I plan to go up to 50. I am really pleased with how the unit is turning out, especially the shields! If you are interested in how I made these unique shields, check out the following post: Converting Kite Shields.

armored skeletons
armored skeletons
armored skeletons
armored skeletons
armored skeletons
armored skeletons

Converting Kite Shields

armored skeletons
For my OOP Armored Skeletons I wanted to create special shields and make the unit really stand out. The original ones are small rounded shields with decorations that look a bit childish to me, although, I must admit, totally in the spirit of the 90s Warhammer Fantasy Battles. :)
Looking at the miniatures I thought that the kite shields would fit them perfectly and make them look striking. It then came to me that the Tomb Kings tower shields that I have laying around could be converted into cool looking kite(ish) shields.
Since I don't have the plastic ones, but only metal, I decided to make molds in silicone rubber and cast the shields in resin. This way I will save the original shields and make the converting process easier. You can use plastic ones if you have them. I decided to use three different designs.
After I made my recasts in resin it was time to start cutting and shaving unwanted parts of the original design. Parts that I cut off are marked with red color, and those that I shaved off are marked in green. To get that V shape I simply cut off the lower parts of the shield. I removed those hanging parchments on the front side of the shields. On the back I removed the handles and over-leaping canvas.
Next, it was time to carve in the wood-grain in the parts that got flat after shaving. For this I used a sharp scalpel blade.
Now the shields were ready for some modeling putty. I used Green Stuff to model the metal rim on the edges of the shields and the circle (gluing area) on the back side.
Finally, after the Green Stuff has hardened completely, I added rivets to the rims on both sides.
To save some time, I again made the mold for the converted shields and multiplied them. :)
And here you can see the shields in action:
armored skeletons
armored skeletons
armored skeletons
armored skeletons

Sunday, December 6, 2020

Flagstone Bases

In this tutorial I am going to show you how I make the flagstone bases for my miniatures, easy and cheap. All you need is your bases, thin sheet of XPS foam, PVA glue, ball pen and an old brush. In this example I am going to do the 25mm square bases but I use the same method for bases of all sizes and shapes.

BUILDING THE BASES

First thing you need to do is clean all of the bases from the excess flesh formed in the casting process. Since you are going to use bases as rulers for cutting the foam, you don't want to bump into unwanted lumps of plastic.

Turn you base upside down on the thin sheet of XPS foam, press it gently and run your scalpel along the edges of the base. Make sure that you have your blade approximately at the same angle as your base profile. Be careful not to damage the base by cutting into the plastic. Face the blade slightly outwards while you cut.
Once you cut out the foam, it is a good idea to check if it fits nicely with the base. Place it on the base and trim if necessary because you don't want the foam sticking out of the base. I like to do the bases in bulk, most often 20 pieces at a time.
Next step, etch the stone designs into the foam. I use the regular black ball pen for etching. There is a small chance that the ink mixes with paint so you don't want it to be blue or red.
After you are done with etching, it is time to glue the foam pieces onto the bases. Apply the PVA glue onto the base (make sure that you apply it all the way to the edges) and gently press the foam onto it. Use your finger to wipe of the excess glue from the sides of the base. In this step it is good idea to do one by one, because the glue will start to dry if you first apply it to all of the bases and then start attaching the foam. Before moving to the next step leave the bases to dry at least for an hour!
Next, we want to seal the foam an make it plasticky. Apply watered down PVA glue (about 60% glue, 40% water) on the foam part (both the top and the sides). Again use your finger to wipe of any excess glue from the sides of the bases.
Leave the bases over night for the glue to settle and dry and your flagstone bases are ready for painting! :) Note that it is really important to seal the foam prior gluing anything to your bases using superglue because otherwise the glue will eat through it.
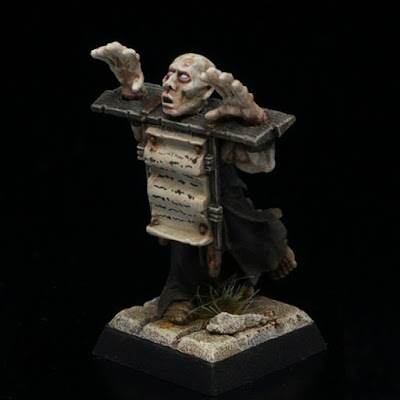
Here are some examples of the miniatures based using this technique:
mordheim
mordheim
mordheim
mordheim
mordheim