Tuesday, August 4, 2020

Kain Von Todtstein

First of the nobles to fall under the dark influence of the necromantic propaganda and deadly dark magic of the Nameless One. As one of his most trusted servants he is believed to be the first one who was sent to spread the word and announce to the world a coming of the end days. Upon his arrival all nature withers and animals die. He is always followed by a great grey mist that appears as his vanguard and remains shortly after his departure. He appears as a terrible dark shadow, clad in armor, with red burning eyes and a cloak of screaming tortured souls. Armed with a huge double handed sword named "The Soul Taker" he is known to chop his enemies in half with a single killing blow. His family ring, now glowing with arcane necro magic, possesses otherworldly powers yet unknown. His appearance is said to be so horrifying that none who saw him in person survived to tell the tale or kept their sanity intact. His first recorded appearance was in the small village of Brashovice near the southeast Empire border. That was the first among many places to witness his cruelty, terror and despair.
vlad von carstein

For the Kain character I decided to go with Vlad Von Carstein miniature from Games Workshop. I think it perfectly fits the background story of Kain.

I always liked the model, although I was never a fan of the official paintjob done by Heavy Metal team (color-wise). He just seemed a bit to bright and flashy for my taste. I decided to go with a darker look. I painted his hair and cloak in black and his armor to represent dark steel and aged bronze. Since dark and muted colors dominate the miniature, brightness of his family ring stands out even more!

vlad von carstein
vlad von carstein
vlad von carstein

Wednesday, July 29, 2020

My Recipe For Painting Rust

More then a few times someone asked me how do I paint rust on my miniatures. So I thought this would be a perfect subject for my first tutorial. The process I am going to show you is suitable for painting various stages of rust, depending on how much technical paint and pigments you use. 
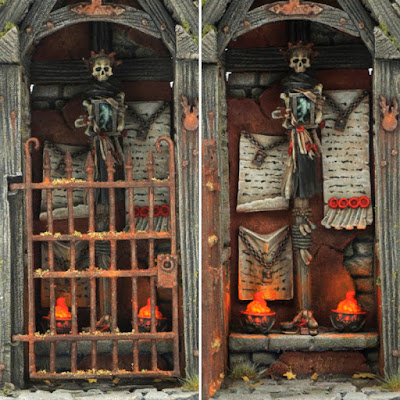
Here are the examples of various stages of rust on shields done with this technique:


To complete this tutorial you will need the following:

PAINTS:

  • Citadel Leadbelcher (or any other dark metal color, like Vallejo Chainmail)
  • Citadel Nuln Oil (or any other black wash)
  • Citadel Typhus Corrosion 

PIGMENTS:

  • MIG Productions Old Rust (or any other dark rust pigment)
  • MIG Productions Standard Rust (or any other medium rust pigment)
  • MIG Productions Light Rust (or any other light rust pigment)
  • MIG Productions Pigment Fixer  


STEP BY STEP TUTORIAL


STEP 1
Basecoat the model in black or dark grey color. It is a good idea to give it a zenithal highlight, although it is not necessary.


STEP 2
Paint the metal area in dark metal color such as Leadbelcher from Citadel or Chainmail from Vallejo.


STEP 3
Wash the area with Nuln Oil from Citadel or any other black wash. You could probably get away with not doing this step but I think it is worth the effort because there is a subtle difference in depth in final paintjob.


STEP 4
Paint the the whole area with watered down Typhus Corrosion. Then apply pure Typhus Corrosion to the parts where rust would accumulate more heavily to give it more texture. While the paint is still wet I like to run my finger over some exposed details like edges, rivets, etc. making these details highlighted and less affected by rust.


STEP 5
Apply Old Rust or any other dark rust pigment. Apply it with a brush, as a powder, not mixed with water. Cover most of the surface but think about where would rust in real life accumulate more and put more pigment to those areas (most often that would be the same areas where you applied pure Typhus Corrosion).


STEP 6
Apply Standard Rust or any other medium rust pigment. As you are moving to lighter rust tones you should concentrate on smaller areas, more affected with rust. Like (in this example) places where metal got eaten through by rust or in the recesses.


STEP 7
Apply the Light Rust pigment to the spots most affected by rust.

STEP 8
To seal/fix the pigments in place use the Pigment Fixer. Apply it with a brush but without doing brush strokes. You don't want to mess everything up. Just touch the surface on a few spots with a loaded brush and let the capillary effect do it's work. Keep in mind that the pigments get toned down once you apply pigment fixer, so don't be afraid to go a little overboard when applying them.


And there you have it, I hope you found this tutorial useful. 🧛‍♀️ Cheers! 🍺

Real life examples:


Saturday, July 25, 2020

And So It Begins...

Welcome to PALEtte!


Having seen so many awesome and inspirational blogs on the internet, the idea of creating my own was slowly growing in my head for last couple of years and I finally decided to go through with it. :)
The main purpose of this blog is to document and showcase my work. I do however plan to make painting and crafting tutorials that I believe will be useful to potential readers and fellow hobbyists.

I am a big fan of old Warhammer world and all things medieval and fantasy in general. Especially dark, grim and gory stuff. My biggest passion is collecting Undead/Vampire Counts/AOS Death miniatures and for them I will dedicate separate page on this blog. Every character and unit will have a background story written by very talented mr. Morbid.

However I like many other miniatures as well and I will feature them on my blog.
Apart from painting and converting miniatures I also love painting and crafting tabletop scenery, be it ready made terrain from different companies or making it from scratch.