Sunday, May 16, 2021

Mortreich's Black Guard

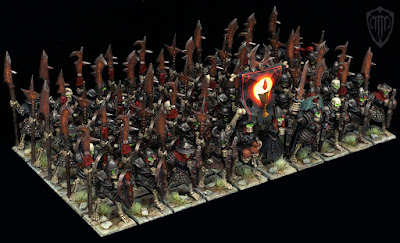
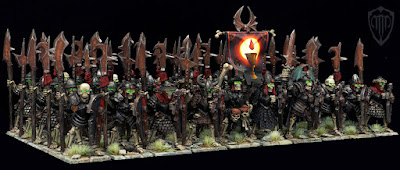
This mighty legion of skeletal warriors clad in dark, full plate armor represents the personal guard of Mortreich von Todtstein. His warrior legion also known as the “Black Host” or "Der Nachtguard" consist of the elite fighters gathered through many centuries, from all around the old world. Some of them where enrolled by being killed and resurrected afterwards, others dug out from their tombs and summoned along the way, and some joined Mortreich by their own free will, while they still lived, granting them upon their deaths the ultimate gift from their supreme commander, that of the un-death and service under his banner for all eternity! Highly efficient, remorseless, cruel as grave and bound to the mighty “Nightfang”, they obey every single word and command from their master.

warhammer armored skeletons
They march to war caring the magical “Blood Moon” standard, allowing them to move at rapid speed. On it, a dark chalice is being filled with a drop of blood, representing the human blood that is being shed in the name of Mortreich. The “Blood Moon” is yet another symbol of the “New Night Order” and the blood sacrifices that shall be done in order to achieve their terrible goal. This blood symbol also represents the blood that forever “lives” on the infamous Mortreich's blade, the "Nightfang", and his vampiric lust for human blood that fuels his dead heart, making the unhuman black blood flow cold trough his veins for all eternity.

Der Nachtguard is here to destroy the world of the living, and the only thing that is faster than the speed of light is the silence of the cursed night by which they travel! The Night and its creatures are one, and eventually they will absorb everything! Fear them, the Black Host has been unleashed! 

Armored Skeletons

I have finally finished this massive unit of 50 Armored Skeletons! I've been in the hobby for more then 20 years and this is the largest unit I have put together so far. It was starting to be a bit exhausting by the end but totally worth the effort. I really think they are a sight to behold. :) Also, it was quite expensive collecting these 90's OOP miniatures from different sellers on eBay. In my opinion, the 90's are golden years when it comes to Games Workshop miniatures. Since there are originally only five different skeletons I decided to convert a fair amount of them in order to make the unit look more varied. By simply swapping heads with those from the old plastic skeletons kit, adding horns and other decorations to their helmets, or even using Bretonnian and Empire helmets, I made the unit much more interesting. Originally I used Bretonian flag for the banner but later replaced it with one from the Grave Guard sprue because I wasn't quite happy with it. I wanted to make my banner resemble to those old school banners that where photocopied from the book and then cut out and painted. :) All in all, I'm very pleased with this unit and looking forward to moving on with my legions. 

If you are interested in how I made the unique shields for the Black Guard check out this tutorial.

armored skeletons
armored skeletons
armored skeletons
armored skeletons
armored skeletons
armored skeletons
armored skeletons
armored skeletons

Thursday, May 6, 2021

My Recipe For Painting Stone

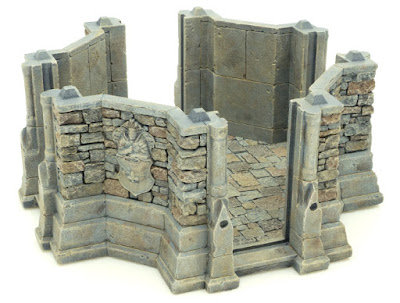
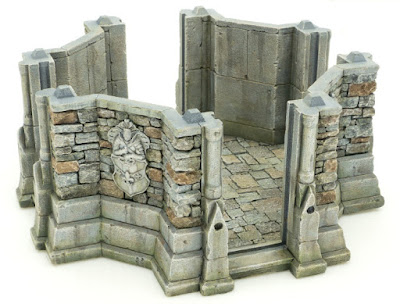
In this tutorial I will give you my recipe for painting stone. I will cover all the steps that I use to achieve the natural look of a stone wall. I will be doing an example of a wall with pronounced color differences between separate stones to make it more visible what I am doing in each step. The result will be a wall like this: If you want your wall to have more subtle differences between the separate stones, simply tone down colors (add even more water to the paint) in steps 2, 3 and 4, and skip step 13. Also if you want your wall to be more greyish, skip the step 8. The result will be a wall like this:

 STEP 1

Basecoat the model in dark grey color. I am using Vallejo Game Air – Blue Grey. Then Highlight the model with a light grey color. I am using Vallejo Game Air - Cold Grey. The easiest way to do this is by using an airbrush or spray cans. However you can use a regular brush as well. In that case use drybrush technique to apply lighter grey over the dark grey.

STEP 2 

To get some variety in stone tones and make it look more realistic, you will be adding different brown colors to individual stones. Pick some of the stones with watered down Citadel – Mournfang Brown. Dilute the paint significantly, you want a watercolor consistency. You can also vary in intensity of the color on different stones. More variety - the better. On the large flat surfaces make random splotches with the same color.

STEP 3

Repeat the process from step 2 but using Citadel – XV-88. This time pick different stones.

STEP 4

Repeat the process from two previous steps, this time using Citadel - Agrax Eartshade. Also, leave some of the stones grey, don’t paint them all in brown colors.

STEP 5

Drybrush the whole model with Citadel – Karak Stone.

STEP 6

Drybrush the model with Citadel - Pallid Wych Flesh. Don't overdo it.

STEP 7

Wash the whole model with watered down sand color. I am using Vallejo Game Air – Sand. Dilute your paint significantly. After applying the wash make sure to collect the excess paint from the recesses using a dry brush, you don't want the bright color to accumulate in the recesses. This wash is serving as a filter necessary for further steps.

STEP 8

Repeat the same process as in step 7 but this time using Vallejo Game Air - Earth color and apply it sporadically, not over the whole model.

STEP 9 

Again drybrush the model lightly with Citadel - Pallid Wych Flesh. Concentrate on the edges. It is a good idea to apply more of this color on the coat of arms relief to make it stand out more.

STEP 10

Now it’s time to add some contrast between different sections of the building and make it more visually appealing. Use Citadel – Nuln Oil and apply it along the edges where different planes of the building meet. Also, use the black wash to emphasize the parts you want, like the coat of arms relief for instance. Black wash was added all around the relief to make it really pop. On the flat areas, do some streaking effects to break monotony. Use a detailed brush to create some streaking effects on the relief. Whenever you apply the wash, blend it with stone using water. Also, a good general rule is to add more of the dark wash to the lower parts of the structure, where damp is more likely to collect.

STEP 11

Add some green tint to different areas of the model. Citadel – Athonian Camoshade is perfect for this. Concentrate most on the parts where you already applied the black wash. This will give it a nice mossy effect and make your walls look as though they ‘we been affected by moisture.

STEP 12

To add some richness to the green tones drybrush very lightly some of the areas (where you applied green wash) with Citadel - Deathworld Forest or any other green you like. Make it really subtle.

STEP 13

To reintroduce the contrast between some of the stones you will again pick individual stones with watered down Citadel – Mournfang Brown. Note that it is best to pick those stones that you already painted in this color in step 2. Pick only some of them, don’t overdo it.

STEP 14

Finally to make your walls really crisp, you will highlight some of the edges. Using detail brush run along the edges of some of the stones with Citadel – Pallid Wych Flesh. Do this on all of the stones you have painted in Mournfang Brown in the previous step and then some of the other stones.

And there you have it guys! Realistic looking, and weathered stone structure. Hope you find this tutorial useful. :) Cheers! 🍻

Thursday, April 29, 2021

Tabletop World Graveyard

tabletop world graveyard

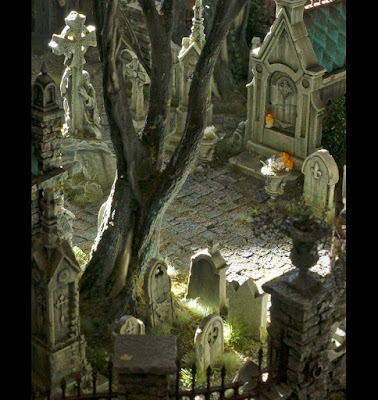
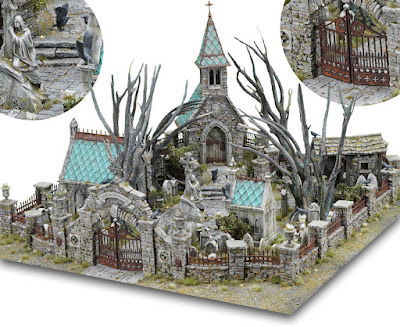
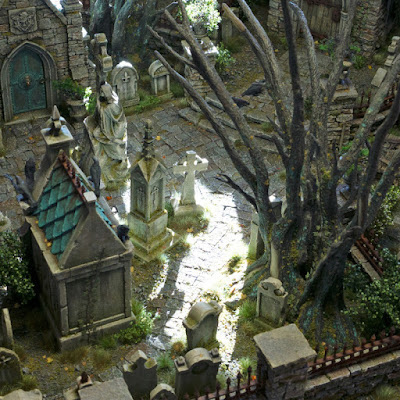
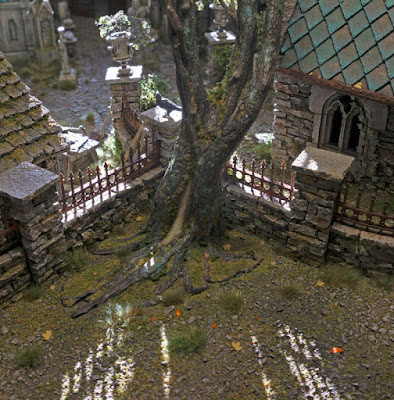
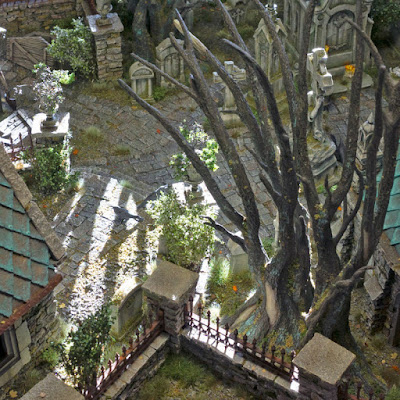
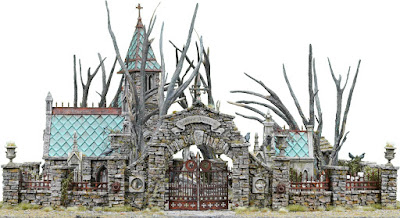
It's time to share with you the  project that took most of my time for several months and kept me away from my Vampire Counts - the grand Tabletop World Graveyard! It was a crazy ride and I really enjoyed the whole process. After planning out the display board, I started by painting individual graveyard structures like the chapel, mausoleum, tomb, etc. Then I did all the smaller features: tombstones, vases, crows,... Finally, I painted all of the walls and fences and dead trees.

To create the flagstone walkways I used segments of Tabletop World Town Square.

I wanted the Graveyard to look pretty weathered, with lots of rusty elements and parts overgrown with grass, moss and lichen. I also wanted a lot of crows resting on the trees, tombstones and other graveyard features to give it that creepy feel.

Without further ado, I present to you the finished Graveyard:

tabletop world graveyard
Tabletop World Graveyard
tabletop world graveyard
Tabletop World Graveyard
tabletop world graveyard
Tabletop World Graveyard
tabletop world graveyard
Tabletop World Graveyard
tabletop world graveyard

As much as I enjoyed working on this big project, at the same time I was frustrated that my Undead are not progressing. However, now I have great scenic piece to use for taking photos of my future Vampire Counts characters and units! 🧛 

Very soon I will be posting painting tutorials on how I painted the stone, wood, rust and oxidized copper on this Graveyard! So keep an eye for it. ;) 

Now back to my beloved Undead! 💀
Cheers guys! 🍻

Wednesday, April 21, 2021

Nightfang Specter Lord

vampire counts wight

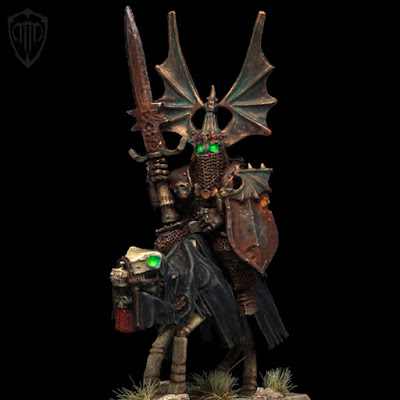
This horrible Wight champion only appears when summoned by Mortreich von Todtstein and the means of his magical blade "The Nightfang". By wielding this powerful ancient weapon and reciting but a few of his dark incantations Mortreich can instantly summon a great host of undead warriors to join him in battle. It is no wonder that this object remains one of the main reasons for envy and hatred towards Mortreich from almost every other undead commander serving under the “Night King”, especially his brother Kain. That being said it is not known where does this warrior captain originally came from and what was his role in the past life. Even his very name remains unknown both to the world of the living and the dead. He is mounted on what was once a mighty, heavy warhorse, but now a nightmarish steed, skeletal and sinister, just as his rider. Most often, when summoned, he comes forward leading the undead cavalry in unstoppable charge. The extraordinary helmet he wears and the mighty sword he is wielding tell the story of their own. Some believe these were forged in the heart of Dark Lands, near the foothills of Worlds Edge Mountains, by the Chaos Dwarves themselves and imbued with immense magical power providing him with unnatural strength and speed. Townsfolk whisper that by tapping into his true origin and rediscovering his real name one might achieve ultimate power and control over him. Is this really true or just some deranged dark fantasy of the common people hungry for power it is impossible to say, at least for now. Will it ever happen or will the world burn and become shrouded in darkness instead, we shall hopefully witness in the coming events. For the evil and the restless dead never sleep. And they never, ever, come alone...

One of those models I immediately fell in love with! The moment I saw this Mounted Wight for the first time in White Dwarf I was fascinated by it. It is hard to explain what is it exactly that I like so much about these 90's Warhammer miniatures. I absolutely love everything about them and this model embodies that style perfectly for me. I decided to paint his ancient armor in rusty tones and oxidized bronze. The only thing that is not from the original model, is the shield. I believe it is from Grave Guard upgrade kit.

vampire counts wight

Sunday, April 11, 2021

Franz the Mutant

mordheim
Recently I have painted this awesome character from Dunkeldorf Miniatures. I really enjoyed painting this guy. The mini has that Lovecraftian feel to it, at least in my opinion. From the moment I saw him, it reminded me of characters in one of my favorite Lovecraft novels - The Shadow Over Innsmouth and the movie Dagon which is based on this story. I wanted to paint the mini and set it in the scene which has that certain cold and damp atmosphere. I envisioned a "fishman", a man who started to mutate into a sea creature and is constantly trying to find places to hide from the eyes of the common people. I enjoyed the process and I am happy with the result. This is the third mini I have painted from Dunkeldorf Miniatures and I can highly recommend them. Especially if you are looking for characters that are not so common - anything from the rat catcher to the hat maker. The terrain pieces in the scene are Tabletop World Stable and Outhouse models.
scene from movie "DAGON"