Friday, October 30, 2020
Hiram Von Todtstein
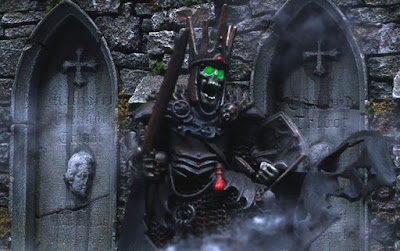
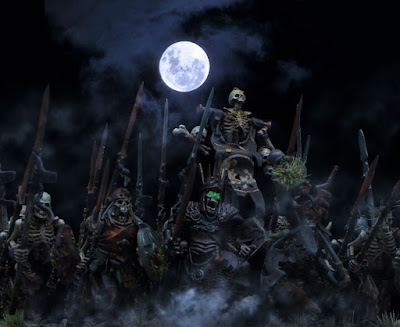
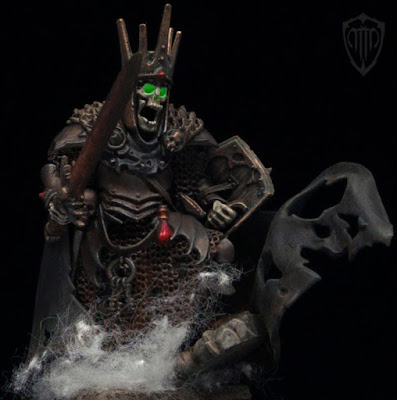
Although I am a huge fan of the classic, Games Workshop, metal Wight models sculpted by Gary Morley in the early 90s, I also really like the current plastic Wight King model. The sculpt is really awesome and the pose is very dynamic. The King is standing with one leg on a tombstone and his robe is flaunting on wind. I used a cotton ball to create the effect of fog spreading around him. I'm pretty pleased how it turned out.
Saturday, October 10, 2020
Mausoleum
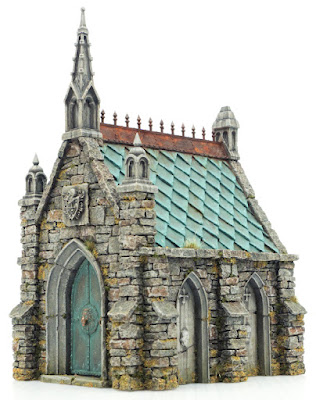
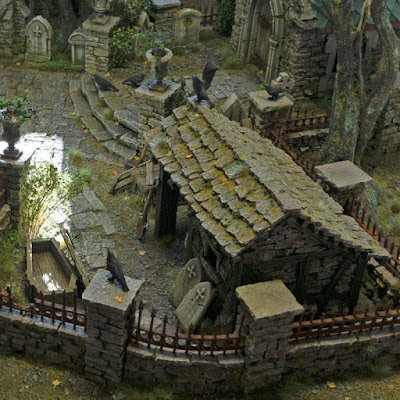
Another Tabletop World piece that I painted for the Graveyard kickstarter which should launch by the end of this month. I really love the model and I painted it in the same style as the chapel. Without further ado, here are the photos :)
Sunday, October 4, 2020
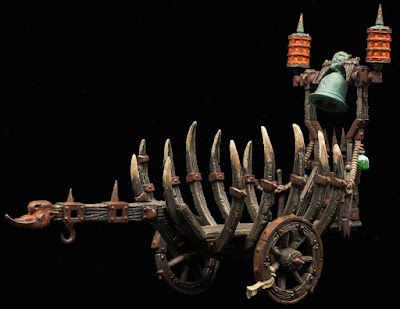
Corpse Cart WIP pt. 2
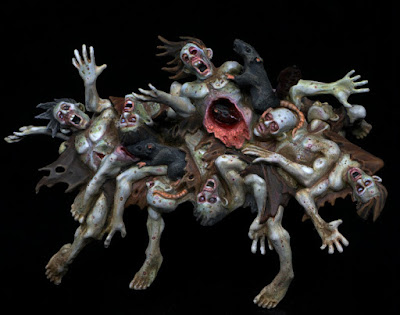
Moving on with my corpse cart... I have finished painting the cart holding the bodies. I wanted to make it look worn out and weathered. Prior painting I used a scalpel to carve in the wood grain into the wooden parts to make them look more realistic. I also used Mig rust pigments on all metals and coverd all of the vials on the back with a layer of clear water effect from Vallejo to make them shine and give them glass effect. Once I finished painting the cart, placing the corpses inside was a real nightmare! I barely managed to squeeze them in, using force. In the process the paint got pealed off on some of the hanging limbs. I would definitely recommend gluing the corpse pile on the wooden bottom of the cart prior gluing the poles that are sticking out. Necromancer and zombies left to do.
Sunday, September 27, 2020
Corpse Cart WIP
I am currently working on the Corpse Cart for my Vampire Counts army. I really want to make it look gruesome and repulsive. Painting the corpse pile was real fun. :) I wanted to make them look decaying and putrid with all postmortem skin changes like livor mortis, vibices, etc. All in all, I'm happy how it turned out.
Moving on to the zombies pulling the cart...
Sunday, September 20, 2020
Kehler Arhnoth
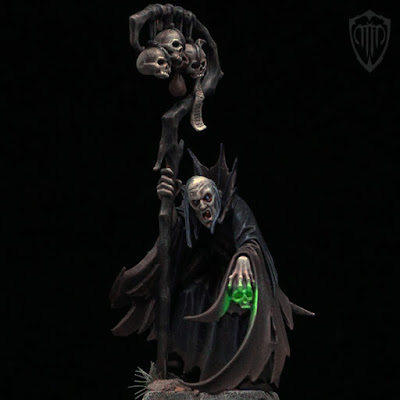
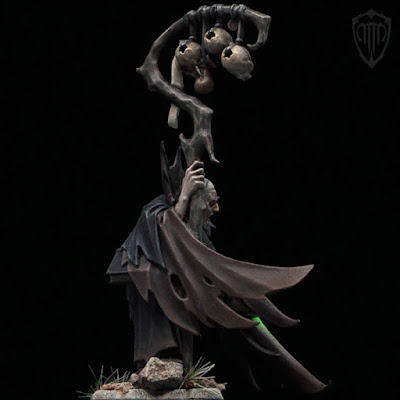
For the Kehler character I decided to use a standard Games Workshop Necromancer. I always liked the model for it's expressive, old face and ragged look. His stuff made of a stick and collection of skulls fits perfectly with the rest of the character. I decided to paint him in earthy tones, black and browns, to make him look even more like a rough-looking man wearing ragged clothes. Also, this way the bright green glow from his skull is in contrast with the rest of the model and becomes a focal point. I also think that the model is very photogenic. :)
Friday, September 11, 2020
Undertaker's Hut
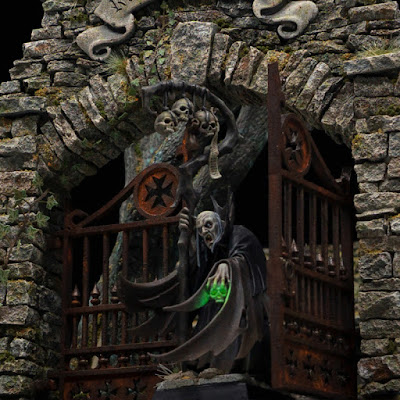
There are lots of details that come with the hut: casket, shovel, saw, pick-axe, workbench,... all these accessories help bring the scene to life. The only thing that is missing is the undertaker himself. Thinking about it, one of the Dregs which I converted some time ago for my Undead Mordheim warband fits the undertaker role perfectly. :) I made him holding a shovel while guarding the coffins of his Vampire masters.
 Talking about my Undead army...my Necromancer will defenitelly pay him a visit. 🧟
 Sunday, September 6, 2020
Tabletop World Graveyard Sneak Peek
I am in the finishing stages of making a big Graveyard display base for Tabletop World. Two days ago, early in the morning, I noticed the sun rays hitting the Graveyard through the window making it look really cool and lifelike. I just had to take few shots, so I'm posting two of them here. Few more days of work, mostly adding vegetation, and this massive project will be complete!
Thursday, September 3, 2020
Kruger "Der Nacht-König" Wärgner
The king of the eternal night and supreme leader of "The New Night Order"
It is believed that he presently abides in one of the ancient Sylvanian castles/ruins of the northern regions. The castle itself has its own forbidden legends and dark stories to tell. Apparently built by the first Von Carstein nobles, "The eldars", who performed horrible rituals and sacrifices during their reign within the castle walls. In order to achieve immortality in what they called "the pure blood rite", they slew thousands of innocents in the darkest era known to mankind – in pre-Sigmar times. The castle was burnt down and abandoned after the first fall of the Von Carsteins. Since the appearance of the Nameless one, the castle walls can be seen again in all their previous might and glory, but only during nighttime. What happens during daylight hours remains a mystery. Is the castle just an illusion? Does it exist for real? Is it trapped within parallel dimensions? This is a conundrum for sages to solve. Glowing green light can be seen frequently from inside the castle during long Sylvanian nights, suggesting powerful necro-magic within its fortified towers.It remains unknown whether he was just another great fallen hero to become a Vampire count Blood Dragon by some foul play of destiny or it was something much greater, darker and far more terrifying - beyond the grasp of mortal comprehension - that spawned him. Is it a myth brought to life? A rumor? A story to scare children? Something else entirely? Nobody knows for sure. There were stories, legends and rumors back in the old days, many tall tales indeed, but most have fallen out of memory since. One of them still survived, though, and it speaks of the following:
Back in the old times lived a great hero. Whether of Bretonnian or Empire stock, it remains unclear. He possessed great strength and charisma and was considered a war-master. He honed his skills and tactics through countless battles against evil. However, it is said that one day he came in contact with Chaos so powerful that it was too much even for him to bare. He was last seen entering the great black pyramid of Nehekhara with the remnants of his once great army and was lost in the labyrinths below for untold centuries to come. Was it he that came to Chaos or the other way around, or was it some other foul and dark force that summoned him back to life wearing his body and armor remains a mystery. Some say he opened the portal to other worlds within the pyramid itself. From there he traveled to the distant future where the Chaos reigned supreme and "tapped" into it, returning with all its forbidden secrets far back into the past of the Old World in order to change the history and conquer all...only this time in the name of the Dead, rather than Chaos.
Throughout history, Kruger was known under various names and different titles. The common folk, mostly terrified out of thier minds and fearing for their souls, wouldn't dare to speak his real name out loud. So when they mentioned him in conversation, he was referred to as "The Namless One". One thing is certain, though. He is a horrible creature of darkness and undeath bent to a single purpose in the Old World - to create the "New Night Order". A world without life, forever.
For the Kruger character I decided to go with Mannfred Von Carstein miniature from Games Workshop. I really like the model, the character looks both as brutal warrior and a mage. However, this model is form the Games Workshop Finecast range. When ordering models from this range it's like playing the lottery. You never know what will you get in terms of quality of the cast. These models are cast in resin and often have small air bubless in the parts. This particular model was worse than usual and I had to fill many holes with modelling putty prior painting. There are still plenty of small air holes in the fur which I left as is, because it would take me ages to fill them all and it can pass as a fur.
My biggest challenge when painting this model was the OSL effect. I had to get out of my comfort zone, since I don't have much experience with this technique. I wanted to make the green glow from the staff reflect on the armored horse and Kruger. I'm quite pleased how the effect turned out.
Monday, August 31, 2020
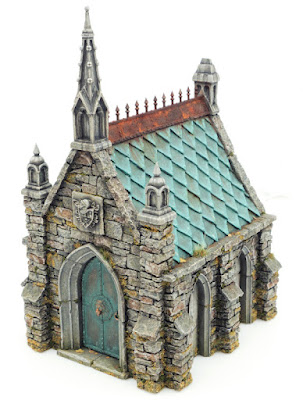
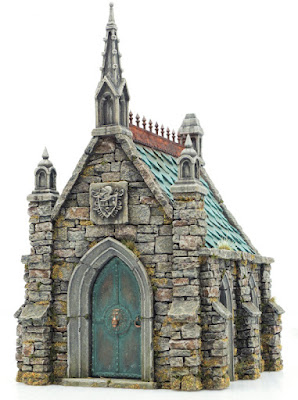
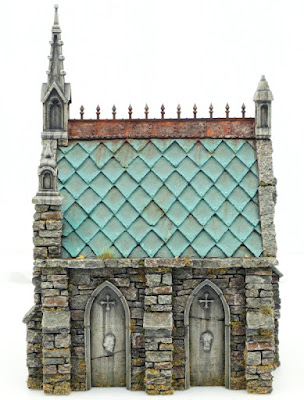
Tabletop World Chapel
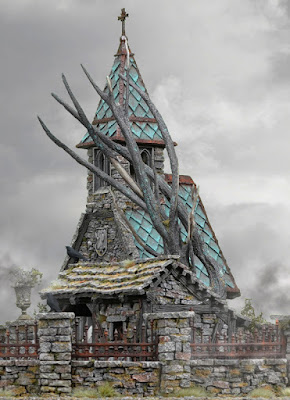
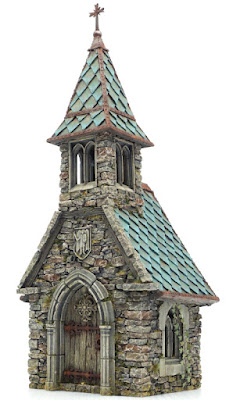
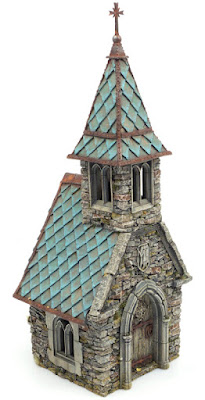
I had to put my Vampire Counts on a side for a while and paint this awesome Chapel from Tabletop World. It will be a part of the upcoming Graveyard kit. Kickstarter campaign for this project will launch in October 2020 and I have to paint all the elements (tombstones, mausoleums, dead trees, crows, coffins...) together with a display base for showcasing it, as soon as possible.
I will be posting more updates on this project but for now, here is the finished Chapel. I'm quite pleased how it turned out.
Saturday, August 22, 2020
My Recipe For Painting Tree Trunks
STEP 1
First tings first. We need to prepare the model for painting. Tabletop World models come precleaned and are ready to paint out of the box. However, these Dead Trees come in several pieces and need to be assembled. Once you assemble your tree, use modelling putty to fill the gaps at the joints.
STEP 2
Basecoat the model and make a zenithal highlight. You can apply zenithal highlights with an airbrush or spray cans. The idea is to spray the brighter colors directly from above a dark painted model. This way yo will add contrast to a model and reveal details fast and easy.
- First, basecoat the model in black color. I like to use Vallejo Nato Black.
- Next, I use 50/50 mix of Vallejo Nato Black and Cold Grey and spray it downwards in a wider angle.
- Finally I like to use pure Vallejo Cold Grey and spray it directly from the top in about 45% degree angle.
STEP 4
To emphasize the bark texture even more I do a light drybrush technique with Citadel Karak Stone color. After this, I like to randomly apply watered down Citadel Agrax Earthshade to give some richness and variety to the colors, especially to the parts where I feel I overdid the drybrush technique, to tone it down.
STEP 5
To paint the exposed sapwood where the bark fell off I paint the areas in Citadel Karak Stone. Using the drybrush technique I highlight these areas in the middle with Citadel Ushabti Bone color. Finally I apply Agrax Earthshade to the edges, where sapwood and bark meet. Using a clean, wet brush I make a transition towards the middle over the colors underneath.
STEP 6
Time to add some lichen. In this step I use five colors. You can get away with using less, but to achieve really nice realistic effect and variety in colors, I advise you to use at least three. The colors of lichen my vary from green, blue and grey to yellow and brown. Also, lichens grow in a wide range of shapes and forms. Some are growing like tufts, some are two-dimensional leaf-like lobes, some are crust-like, some powdery etc. To represent different forms of lichen I will be using both paint (two-dimensional lichen) and different types of fine turf (three-dimensional lichen).
In this step I will be doing two-dimensional lichen. I start off by applying Citadel Waaagh Flesh with stippling technique. It is important that you use an old and distressed brush in this process. I dab off most of the paint on the paper towel and start applying the paint with dabbing motion. I repeated this process with the rest of my colors going from darker to lighter (Vallejo Foul Green, Citadel Nurgling Green, Citadel Nihilakh Oxide and Citadel Ceramite White). I tend to stipple these colors in condensed areas, next to each other to achieve variety in tones. Also, I do more lichen at the bottom of the tree and less going upwards.
STEP 7
For more three-dimensional lichen and moss I use two types of fine turf from Woodland Scenics: Green Grass and Burnt Grass. I use predominantly Burnt Grass, which is more yellowish, for lichen, and Green Grass for moss. However, I do like to combine the two in some areas. For lichen, I dab watered down PVA glue in small areas, preferably next to the already painted lichen, and than simply sprinkle the Burnt Grass over it. For moss I apply PVA glue in larger areas and proceed with the same process using Green Grass. I tend to do more moss towards the ground. Once this is dry I blow off the excess turf in a plastic bag and save it for later.
STEP 8
Finally, for the tuft-like lichen I mix PVA glue and water in 50/50 ratio and add to it a mixture of Green and Burnt grass fine turf. You want to get chunky consistency. Pick the small chunks with your brush tip and apply it to the tree trunk. When doing lichen and moss, always think about where would it be most likely for them to grow in real life.
STEP 9
Additionally, if you really want to spice up your trees, you can add some dead leaves to the bottom of the trunks and ivy climbing up on them. For vegetation, I like to use Ammo Mig products. If you are using Ammo Mig Ivy, I suggest that you paint it prior cutting it out of the sheet. It's much easier and safer.
And that is all for this tutorial. Hopefully you have taken something from it. :)
Till the next time, cheers! 🍻

