After finishing the plaster on all of the walls, which took my a while, I am now doing final tedious work...putting the shingles on the roof and filling gaps with green stuff. After that I have a couple of hundred rivets to do. 😅


After finishing the plaster on all of the walls, which took my a while, I am now doing final tedious work...putting the shingles on the roof and filling gaps with green stuff. After that I have a couple of hundred rivets to do. 😅
With the work I have done on the roof the house is starting to get the final shape. I also started to build a stone chimney and added details to the left side of the house. Soon I will be adding plaster to the walls, rivets to the beams and planks, and shingles to the roof. I also plan to add some windows to the roof but I didn't came up with satisfying design yet.


Continuing the work on the house. I moved to the upper floor now. Apart form the basic construction, I'm doing mainly timber at the moment. Afterwards I will be adding stone and plaster to the walls. Everything is going as planed so far.
First I constructed the wooden floor which is supported by the beams bellow. Then I added additional wooden beams to support the floor, especially the balcony.
 Then I started to raise walls and work on the balcony. I deconstructed the balcony of the Tabletop World Townhouse II model and with a bit of reconstruction and tweaking I made a new, smaller one which fits perfectly with the new house.
 Then I moved on with construction and started to add some details, mostly timber.
 And this is where I'm currently at. I did a second entrance in the back of the house which will also have a crane and serve as a little storage room.
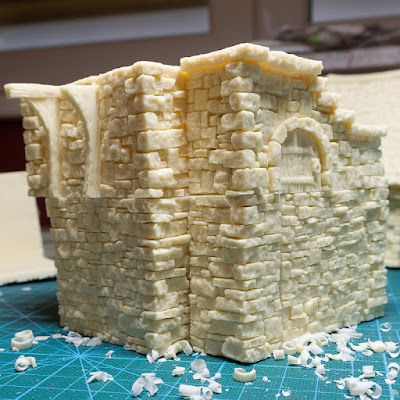
More work has been done on the house! First I finished the stone work on the other side of the house, apart from the section bellow the stairs which needed to be completely remodeled.


I finally found some time to continue work on my Townhouse. I did some stonework and added wooden beams to the walls. I also added two windows. When deciding were to put windows and other openings I always take in consideration both the esthetics and the gameplay.
I really like how this project is developing.


Back to my Altburg Townhouse project! I decided to completely change the design of the original Merchant House model. I have lowered the floor so that the interior is a bit higher and can fit the minis more easily. I also replaced original wood planks with flagstone. I removed the front wall and extended the whole floor for about 2cm, again to have more space inside. The original doors were fixed, so I decided to replace them with the hinged version. Now the doors are fully functional. I removed all the textures and details in interior as well as on the exterior because I plan to completely redesign them.


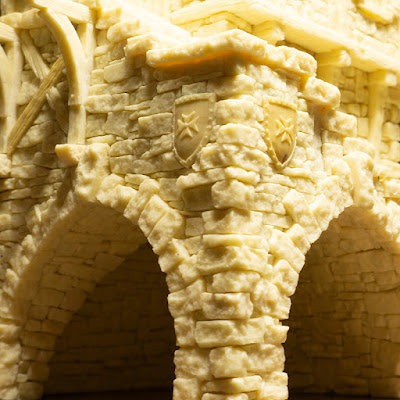
...so I finally found the time to finish the cross-vault. I have also rebuild the walls and added a couple of shield reliefs as decorations. I am planing to extend the room in the upper floor, so I made some preparations by adding two supporting beams coming out of the wall. I also left a hole in the wall where I am going to put a sign.
Here are the photos of the house so far:


Ok, so the cross-vault is turning out pretty well, I think. I did check some of the real life examples before I started crafting, to make sure I do it right.


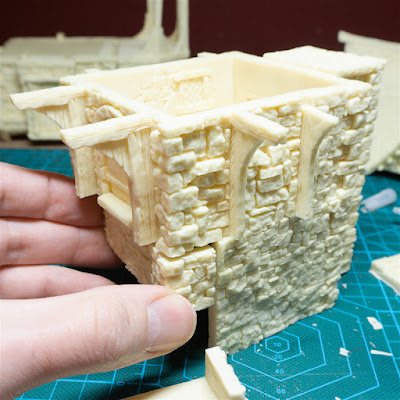
For now I have the basic construction done. I am also slowly removing some of the stone texture because I am going to rebuild most of the walls in order to blend all the sections together and make the walls look more uniform.


Moving on with the house...I have finished the flooring (although I will do some finishing touches later on). The platform looked a bit dull to me so I decided to make the intersecting vaults in the corner where the walls are highest. I think this way it will look much more pleasing to the eye and also give valuable hiding space for miniatures.


Then I made the outlines on the walls and used a Dremel drill to cut out the openings for the arches:

Finally I inserted the arches into the walls and sealed them in place with liquid resin:

This was the easy part. Now I will have to build a cross-vault inside. This will be a bit tricky.